This is a small post regarding "Implementation of CSS in ADF". Implementation of CSS in ADF application is very common and is also very useful as well, as it enhance the User Interface (UI) of Application.
JDeveloper supports two options for applying style information to your ADF Faces components:
- Build a skin and a cascading style sheet (CSS) using defined style selectors and configure your ADF application to use the skin and style sheet.
- Use style properties to override the style information from the skin CSS to set specific instances of component display.
Here, we are going to use a CSS file to change the look and feel of ADF components.
STEPS ARE AS FOLLOWS:
1) First, create a Fusion Web Application (ADF). I have created CssInAdf.

Then, create a *.jspx page as showing above.
2) Now, you can add ADF faces components on your *.jspx page, so that we could apply CSS on those components. I have used ADF's outputtext component for the same.
Type outputtext in component palette (appears right side of your screen by default) &
Drag & drop Output Text (ADF Faces.Common Components) from component palette to your *.jspx page.

To provide space between two outputtext or any other components, you may use Spacer (ADF Faces.Layout) and can set its width or height as shown in the following image.
Here I haven't applied any panel or from on this *.jspx page. However, you may use PanelGroupLayout or PanelFormLayout to customize your page as per your requirement.
3) Now, right click on ViewController and go to New option. Create CSS file and give a name to it.

Now, there will be a CSS file under your Web Content section on your Application Navigator (left side of your screen). This CSS file comes up with some default text which you can delete if you do not need that.
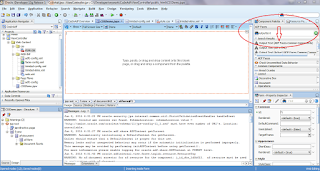
Here, I have created 3 new CSS classes mycss1, mycss2 & mycss3 respectively. See below:

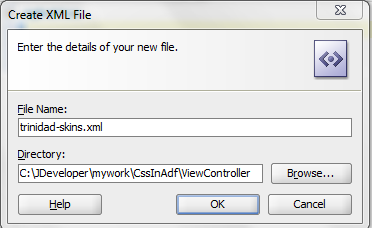
4) Now, create trinidad-skins.xml file. Right click on WEB-INF & choose New option. Now, select XML Document (XML) from the list.


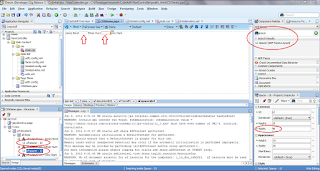
Now, paste the following code in trinidad-skins.xml file:
**Note: Please note one thing that skin-family should be same in both XML file (trinidad-config.xml & trinidad-skins.xml). Like I have used skyros in both the files.

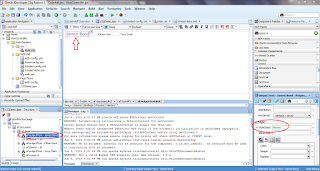
In above image style.css (text in red circle) is the name of the CSS file which we had created earlier and css is the name of the directory under which it exists.
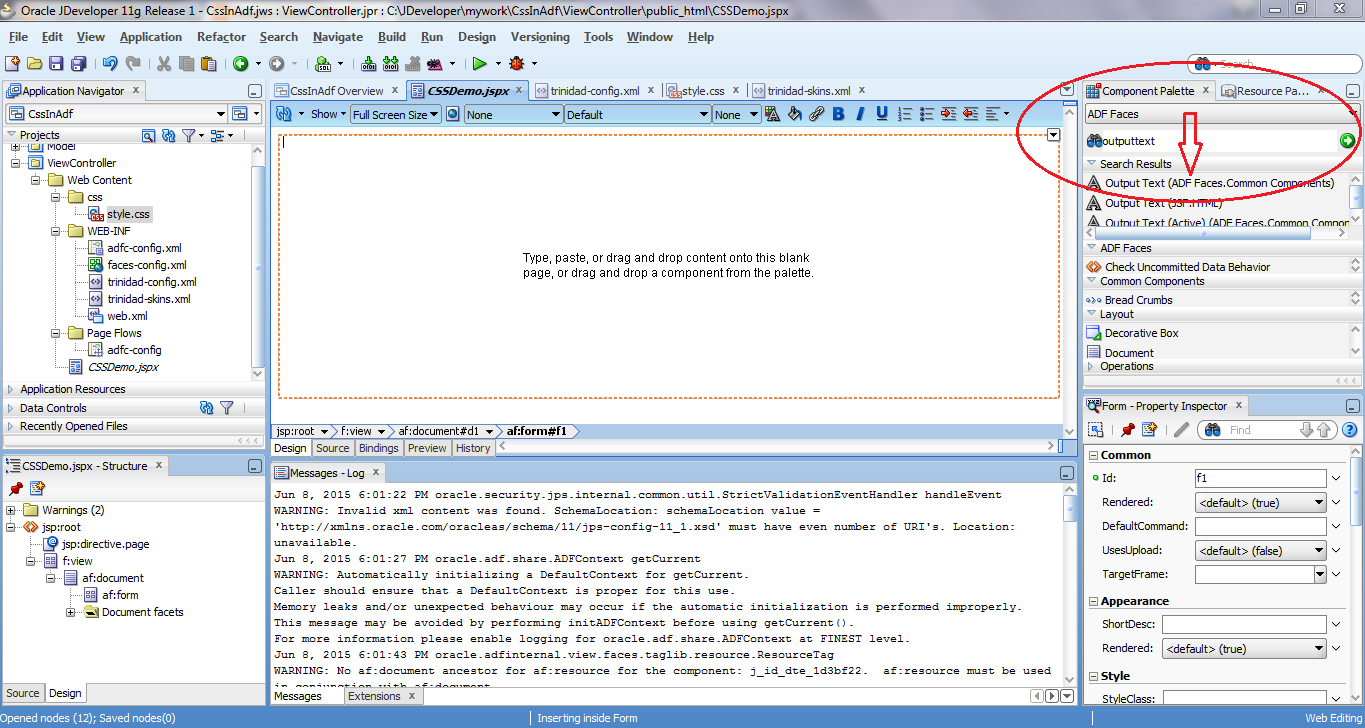
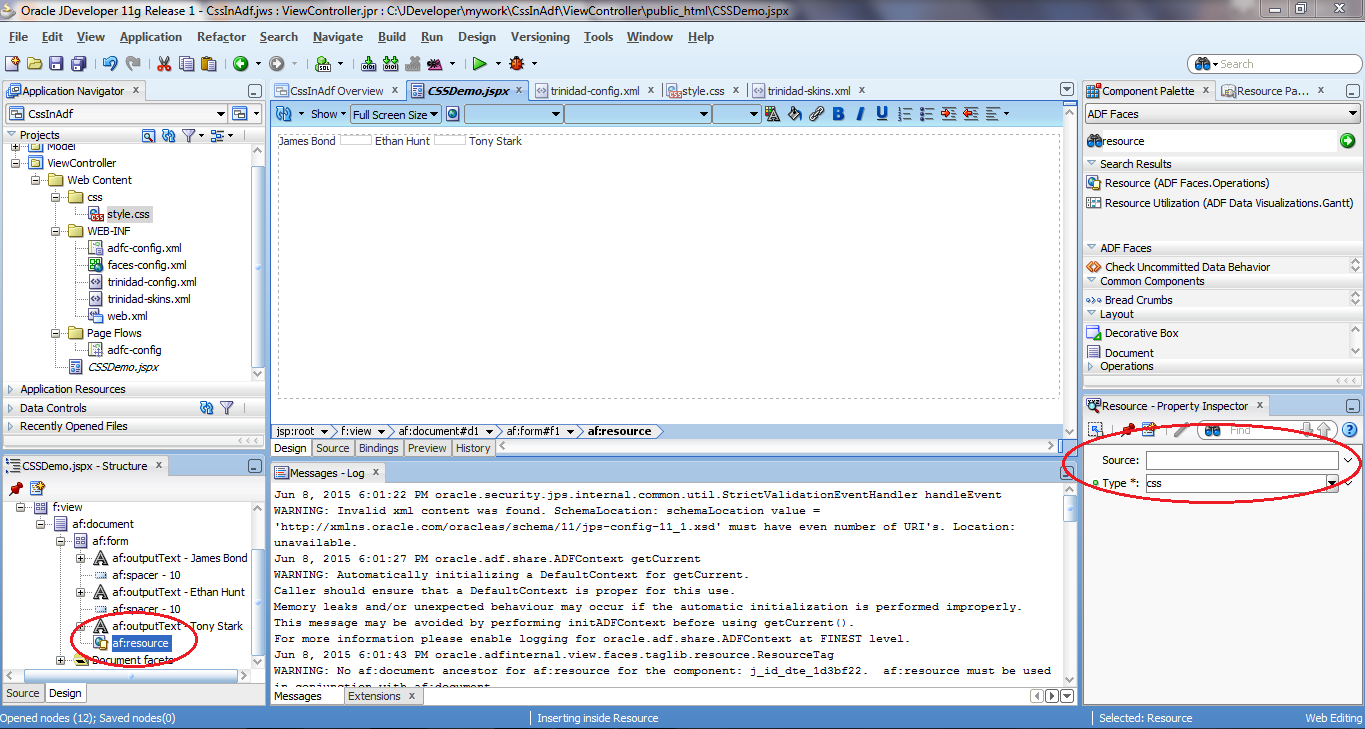
5) Now, go to your *.jspx page and find resource component in your component palette. Drag & drop it on form of your *.jspx page and select type as CSS.


6) Now, select resource component from you *.jspx's Structure panel and go to its Property Inspector. Provide the source of your CSS file as shown below :-


After clicking on Edit button you can choose your style.css file and press OK. Now, you would be able to see something like below:

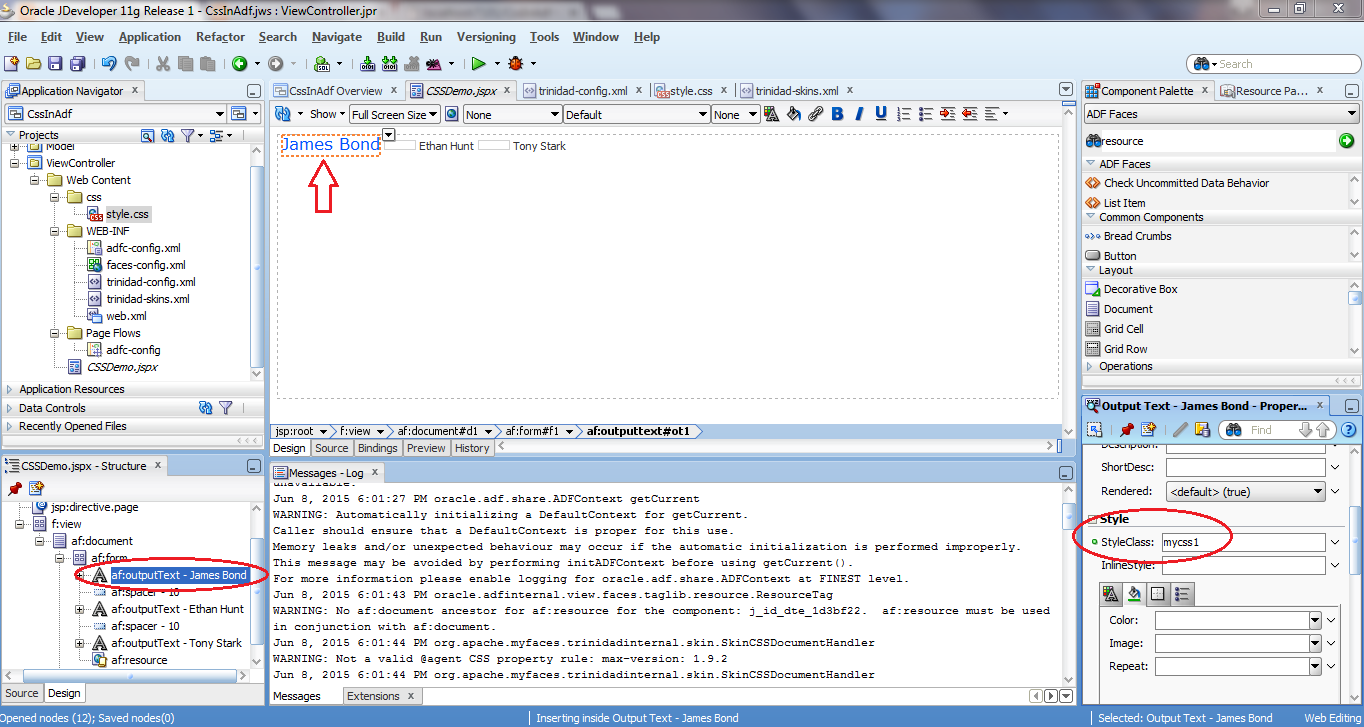
7) Now, select the the OutputText component from your *.jspx page and go to its Property Inspector and provide the CSS class name in StyleClass section. Changes will be shown on your JSPX page. Like below:
Repeat the same thing for next two OutputText component & run your JSPX page. JOB DONE...!!
Here is the final screen....

--> You can download the sample application from here
Important Points:

Then, create a *.jspx page as showing above.
2) Now, you can add ADF faces components on your *.jspx page, so that we could apply CSS on those components. I have used ADF's outputtext component for the same.
Type outputtext in component palette (appears right side of your screen by default) &
Drag & drop Output Text (ADF Faces.Common Components) from component palette to your *.jspx page.

To provide space between two outputtext or any other components, you may use Spacer (ADF Faces.Layout) and can set its width or height as shown in the following image.

Here I haven't applied any panel or from on this *.jspx page. However, you may use PanelGroupLayout or PanelFormLayout to customize your page as per your requirement.
3) Now, right click on ViewController and go to New option. Create CSS file and give a name to it.

Now, there will be a CSS file under your Web Content section on your Application Navigator (left side of your screen). This CSS file comes up with some default text which you can delete if you do not need that.
Here, I have created 3 new CSS classes mycss1, mycss2 & mycss3 respectively. See below:

4) Now, create trinidad-skins.xml file. Right click on WEB-INF & choose New option. Now, select XML Document (XML) from the list.

Now, paste the following code in trinidad-skins.xml file:
**Note: Please note one thing that skin-family should be same in both XML file (trinidad-config.xml & trinidad-skins.xml). Like I have used skyros in both the files.

In above image style.css (text in red circle) is the name of the CSS file which we had created earlier and css is the name of the directory under which it exists.
5) Now, go to your *.jspx page and find resource component in your component palette. Drag & drop it on form of your *.jspx page and select type as CSS.


6) Now, select resource component from you *.jspx's Structure panel and go to its Property Inspector. Provide the source of your CSS file as shown below :-

After clicking on Edit button you can choose your style.css file and press OK. Now, you would be able to see something like below:
7) Now, select the the OutputText component from your *.jspx page and go to its Property Inspector and provide the CSS class name in StyleClass section. Changes will be shown on your JSPX page. Like below:
Repeat the same thing for next two OutputText component & run your JSPX page. JOB DONE...!!
Here is the final screen....

--> You can download the sample application from here
Important Points:
We can use following options for applying style information to the ADF Faces components:
- Style Selectors - Style sheet rules include a style selector, which identifies an element, and a set of style properties, which describe the appearance of the components. ADF applications can use the skin and stylesheet using the defined style selectors. ADF Faces components includes following two categories of skin style selectors:
- Global selectors determine the style properties for multiple ADF Faces components.
AFDefaultFontFamily:alias { -tr-inhibit:font-family; font-family:Arial, Helvetica, sans-serif !important; } - Component selectors are selectors that can apply a skin to a particular ADF Faces component.
af|inputText::content { background-color: red; } - Style Properties - You can adjust the look and feel of any component at design time by changing the style-related properties which always render on the root DOM element. Any style-related property you specify at design time overrides the comparable style specified in the application skin or CSS for that particular instance of the component. ADF supports following style related properties:
- The inlineStyle attribute is a semicolon-delimited string of CSS styles that can set individual attributes. They are applied to the root DOM element of the component e.g., we can apply style to a wrapper span for input using following
<af:outputText value="outputText1" inlineStyle="color:Red; text-decoration:overline;"/> - The contentStyle attribute is available for some of the ADF Faces component like inputText. We can style style attributes that do not register on the root DOM element, e.g., we can style input item on the HTML page – where the user enters the value using following
<af:inputText value="outputText1" contentStyle="color:Red;"/> - The styleClass attribute is a CSS style class selector used to group a set of inline styles, e.g.,
<af:button text="Submit" id="btnSubmit" action="#{pageBean.submit}" styleClass="my-btn"/>
We can also style the final generated HTML using the traditional CSS elements and selectors - type, ID and class. This CSS file can be stored internal or external to the application. ADF assigns auto-generated class to each of the HTML element. We should not rely on these, as the class name and generated HTML structure can change with every release. If we need to use external stylesheets, we should define and assign our own custom class selectors to avoid migration issues.
What is skin?
An ADF skin is a special type of cascading style sheet (CSS) that allows you to customize the appearance of these components. Instead of providing a CSS file for each component, or inserting a style sheet on each page of the application, you create one ADF skin for the web application. Every component that renders in the user interface automatically uses the styles defined by the ADF skin. This means you do not have to make design-time changes to individual pages to change their appearance when you use an ADF skin. Skinning refers to the task of developing an ADF skin to apply to a web application that uses ADF Faces and ADF Data Visualization components in the user interface.
How to use custom styles?
ADF provides a rich set of skin selectors. But skins are not used to style individual instances of components. We can still achieve it using custom class selectors.
We can set a custom style on af:inputText using following code:
<af:inputText id="input1" label="Name" styleClass="my-input"/>
We can then define this custom style within the skin as following:
af|inputText.my-input {background-color:yellow}
af|inputText.my-input af|inputText::content {background-color:red}
af|inputText.my-input af|inputText::label {font-weight: bold}
Also, the custom selector are very useful when we are using external stylesheet, instead of the auto generated class selectors.
Skinning vs External Stylesheet
Following table provides a comparison between usage of skinning and external stylsheet within ADF:
| ADF Skin | External Stylesheet | |
|---|---|---|
| Approach | Component based | HTML based |
| Page Designing |
Web page developers have no direct control over the HTML that is rendered. Components generate the HTML for themselves.
To help in better understanding of styles we should set the web.xml contextual parameter org.apache.myfaces.trinidad.
DISABLE_CONTENT_COMPRESSION=true during CSS design. | Web page developer can design an HTML page in its entirety, taking care to proper alignments across containers, leveraging relative CSS positioning, components can only generate the HTML for themselves. |
| Maintenance |
Skin files are less intuitive than external stylesheet for webdesigners and have a learning curve. But styling components provide productivity and help achieve consistency in source code and in look & feel.
| Styling is based on HTML elements like <div>, <span>, <ul> etc. |
| Declaration | You do not need to include skin on every page. They are applied to all the pages based on any EL expression defined. | The external stylesheets have to be declared |
| Scope |
Skins applies to the entire application. They are not used to style individual instances of components, although to some extent we can make skin features conditional.
RichClient components – allow multiple styleclasses to be set. For example the inputText component has inlineStyle and contentStyle. The latter applies to input item in the HTML page – where the user enters the value – while inlineStyle is a set of CSS styles that are applied to the root DOM element of the component. Many components are composed of several DOM elements which may have their own styles applied to them.
Alternatively, we can define our own custom class selectors within the skin which can style components individually.
| If you do not wish to change ADF Faces components throughout the entire application, we can create a custom class selector in an external stylesheet and assign it to a component on the page using styleClass property. |
| Inheritance | Skin styles inherit properties from each other, making global changes across all or all similar components fairly simple. | We can use CSS inherit keyword which will still be dependent on the generated output by ADF. |
| Browser/Locale Support | Skins provide built-in support for different browsers and locales. ADF generates CSS code based on OS, browser and locale at runtime. | We have to write browser specific CSS code. |
| Dynamic Loading | Skins can be switched dynamically using EL expressions with templates or using EL expression within trinidad-config.xml | The resources on the page are bound during the declaration time itself. |
| Compression | ADF optimizes the page and applies compression to the skin files. | External CSS files would require an external solution for optimization. |
| Runtime updates | Since skin is bundled along with the ear file, it cannot be updated without restarting application. | External CSS can be updated without requiring an application restart. |
| Media Queries | Media queries cannot be used within skin files and need to be kept in a separate external stylesheet. With ADF 12.1.3 onwards, we can use media queries within ADF skin file with selectors. | Any media query supported by ADF can be placed here. |
Summary
Though skinning is less intuitive in the beginning to web developers, it provides lot of benefits like property inheritance, global stlying, support for different platforms & browsers, dynamic switching etc. Also, since ADF is component based application, developers will not have the control over the HTML generated. So it is more efficient to use component based approach like skinning over external stylesheet. Styling should not have to depend on the HTML structure.
But there will be cases where applications will be forced to use external stylesheets - like media query support before ADF 12.1.3 or ability to update CSS without restarting application.
So the decision to use one over another or using mixed approach will depend on the application requirements. But in most of the cases skinning provides lot more control and adavntages over the traditional external stylesheets within ADF.


